尤雨溪带你实现虚拟节点
次访问
前言
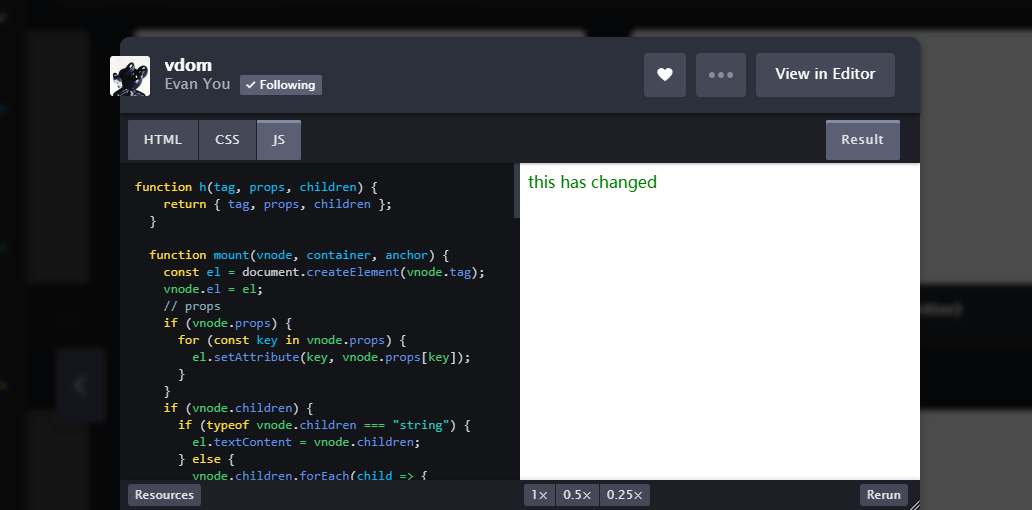
本篇文章主要是解析尤雨溪在codepen上实现的一段vdom代码。这段代码实现了一个简易的Virtual DOM。
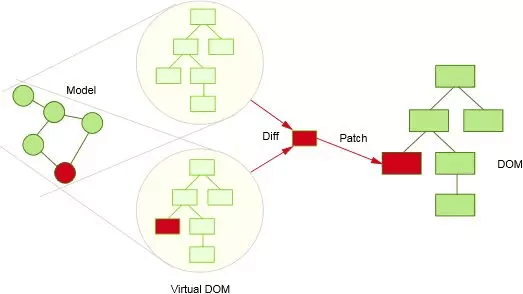
Virtual DOM的作用是减少浏览器对页面的重绘,从而让用户体验更好,通过js把页面渲染相关的东西存起来,在数据更新的时候,不直接用新数据来重绘整个页面,而是先对比数据差异,在数据变化的地方局部渲染。接下来,我们就看看尤雨溪会怎么实现一个简易版本的Virtual DOM,从而让大家更好的理解Virtual DOM算法
代码解析
核心代码就两个函数,mount和patch,mount的字面意思是安装、镶嵌,嵌入,这里我们可以理解成渲染,patch的字面意思是补丁,这里我们可以理解成用新数据对页面打补丁,即局部更新页面。
首先我们看看mount函数:
1 | function h(tag, props, children) { |
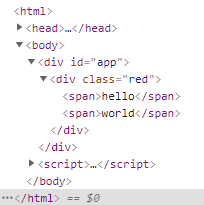
上面这段代码,在页面中的#app元素中添加了tree1:
mount函数接受3个参数:vnode虚拟节点,container容器,anchor锚。
执行mount(tree1, document.querySelector(“#app”));,即渲染节点树tree1,tree1通过h函数包装后,返回的是一个对象,有tag, props, children3个属性。
在mount中,首先tree1的tag属性做处理,用createElement创建节点,然后把这个创建的节点el赋值给vnode的el属性。
然后对tree1的props属性做处理,如果props存在,就遍历props的key,通过setAttribute把props设置到el上。
然后对tree1的children属性做处理,如果children存在,就看看children的类型,是字符串的话,就把值赋值给el.textContent,否则就遍历children,对每个遍历到的值child执行mount(child, el)。所以对于children,最后都会走到类型是字符串那一步,从而更新到el的textContent中。
最后对anchor做处理,anchor的字面意思是锚,所以这里用来控制要渲染的节点树的位置。如果anchor存在,就在已有的节点anchor前面插入el节点,否则就把el节点添加到container中。
简单来说,mount函数根据虚拟节点来操作HTML页面,实现页面的更新。
有props时将props中的属性加到标签上;有children时,是字符串的children就直接把值写入父元素,否则就对children中的元素迭代mount函数;有anchor时就把创建的el加到anchor前面,否则就默认加到父元素container中。
接下来我们看看patch函数:
1 | function patch(n1, n2) { |
patch函数接受2个虚拟节点的参数。
首先判断老节点和新节点的标签是否相同,不同的话就直接用新节点替换掉老节点,也不用继续往下走了。比如老节点是div,新节点是span,那么这2个节点就完全不一样,就需要直接替换掉整个节点。
替换也很简单,获取老节点的父元素parent和紧跟的节点anchor,然后删除老节点,然后把新节点渲染到anchor前面。
如果类型一样,比如都是div,那么接着找差异。
先初始化el,老节点的el就是在mount渲染是赋值的tag,因为类型一样,所以我们将这个值也赋值给新节点。
接下来寻找props的差异,因为props是设置在el上的,所以我们由外而内逐步寻找差异。
首先初始化新修props,取虚拟节点传入的props,没传就是{}。
然后遍历新props中的key,通过key取新就props对于的value,一旦新旧value不同,就要做处理,新value存在就setAttribute,不存在就removeAttribute。比如这里遍历到的key是class,那么newValue就是green,而oldValue是red,所以将class设置成green,如果我们的tree2没有传{ class: “green” },那newValue就不存在,那就会移除el上的class属性。
newProps遍历完了,这一步将newProps中不为空的属性设置到了el上。
那有的属性oldProps有,而newProps没有呢?
所以接下来就是遍历oldProps,如果oldProps中的key,在newProps中没有,就移除这个属性。
处理完props的差异,接下来处理children的差异。
首先把新旧节点的children分别赋值给oc和nc,代表oldChildren和newChildren。
如果nc是字符串,还跟oc不一样,就把nc直接赋值给el.textContent。
否则,看nc是不是数组,是的话,就继续往下看。
如果oc不是数组,那就说明nc和oc开始变得不一样了,这时直接将el中的内容清空,遍历nc数组,对nc中的内容逐个mount渲染到页面。
oc也是数组的话,就需要继续寻找差异,这时我们先去oc和nc数组长度中较小的值,在这个长度内,逐个迭代patch函数来打补丁,最后迭代到nc是字符串,直接更新el.textContent。这样就处理完了oc和nc长度相同的部分,比如oc长3,nc长5,那么oc和nc的前3个就处理完了,接下来就处理剩下的2个。
如果nc比oc长,我们只需要把剩下的2个渲染;
如果nc比oc短,比如nc长1,oc长7,我们把nc和oc的第一个处理了,oc还剩后6个没处理,这时我们只需要截取oc的后6个,然后逐个删除。
到这里,我们的children也找出了差异,并把差异部分更新到页面,实现了局部更新。
总结
虚拟节点的原理是不是很简单?我们不谈高大上的diff算法,Virtual DOM,局部更新等名词,就只是简单的实现一个通过js来局部刷新dom的功能,看起来就简单多了。